Vacancy Matching in PICSWeb
- Joe Robson (Unlicensed)
Accessing Vacancy Matching
To match your applicants and vacancy records and create a new Application in PICSWeb, you will need to run the vacancy matching process. This can be done from two locations:
- The Applications tab in an Applicant Summary – This will search for appropriate vacancies to match to the current applicant. Select Match Vacancies in this tab to open vacancy matching.
- The Applications tab in a Vacancy Summary – This will search for appropriate applicants to match to the current vacancy. Select Match Applicants in this tab to open vacancy matching.
The vacancy matching window works like other list pages in PICSWeb, consisting of a number of filters used to restrict your search and a list of results.
The first time you run vacancy matching, PICSWeb will automatically check results to make sure that the necessary location data is held for record postcodes. If missing information is found, a button will be displayed to Populate Missing Postcode Locations. Select this to update your records and continue.

Vacancy Matching from an Applicant Record
The following instructions cover searching for a suitable vacancy from an applicant record.
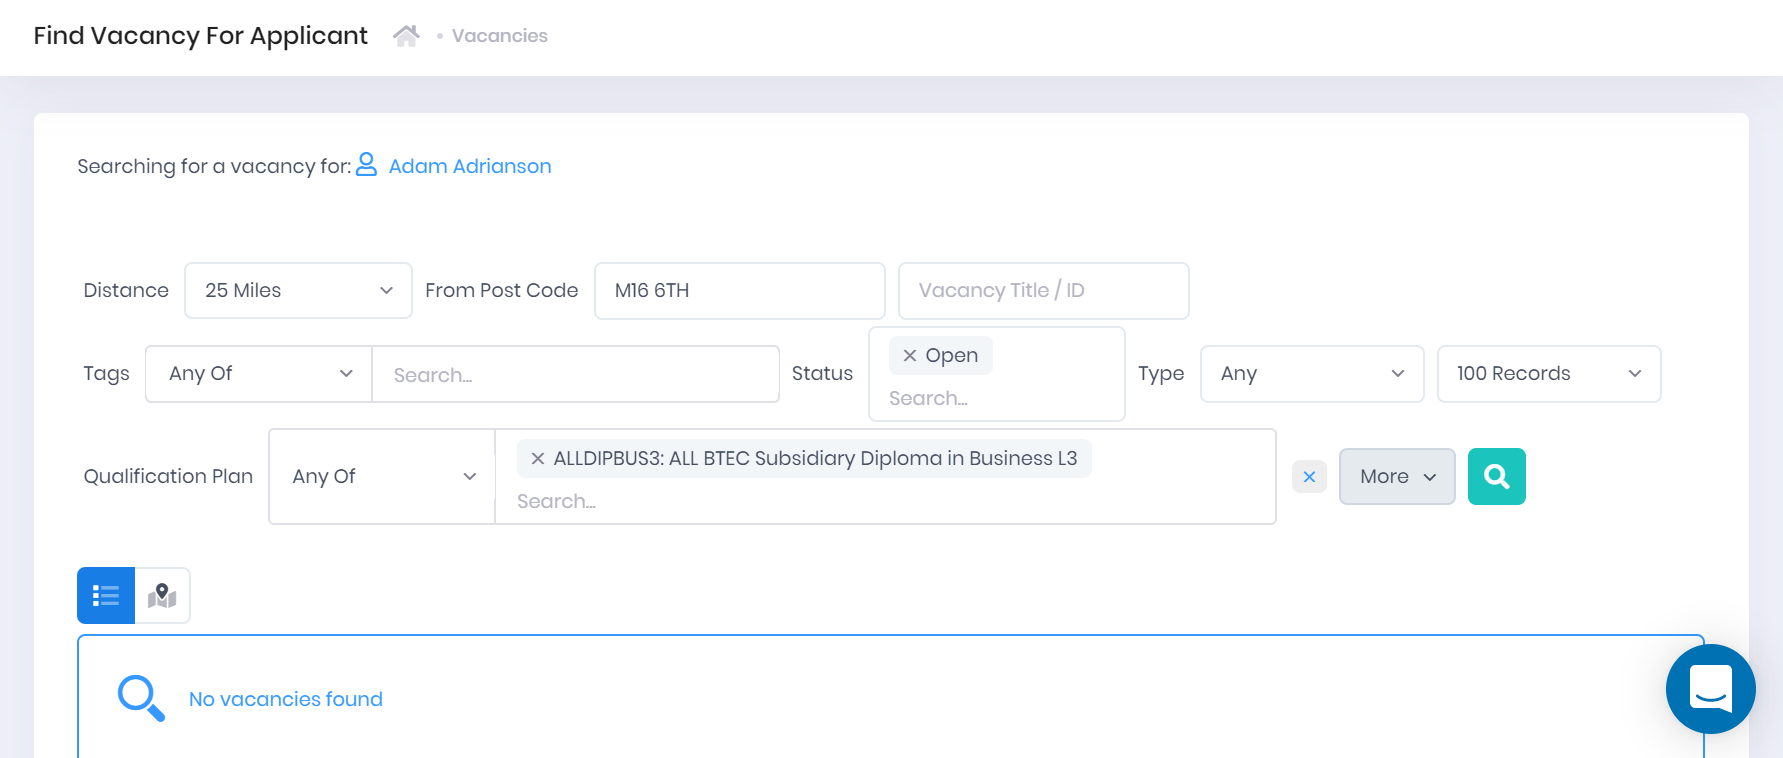
Filtering the Vacancy Search
The following filters will be shown in the vacancy matching page if you have opened it from the applicant summary:
- Distance – Here you can specify the maximum distance between the named postcode and the address of the organisation that posted the vacancy.
- From Post Code – This is the postcode from which the distance will be calculated. This will be set to the applicant's postcode by default.
- Vacancy Title/ID – If you are searching for a specific vacancy, you can use this field.
Tags – Selecting the Search... box will open a drop-down menu where you can add multiple Tags to search by. The following search options are available:
- Any – This will filter the list to records that contain at least one of the specified tags.
- All – This will filter the list to records that contain every specified tag.
- None – This will filter the list to records that do not have any of the specified tags.
- Status
- Vacancy Type
- Number of Records Displayed
Along with these, additional filters are available by selecting More. If a value for any of these has been added to the applicant record, the filter will be added to the page automatically and populated from the applicant record. The following filters are available:
- Standard Occupational Classification (SOC)
- Sector Subject Area (SSA)
- Occupational Area
- Custom Provision – Custom provisions can be set up and maintained by your database admins in the Custom Provisions section of List and Type Configuration.
- Qualification Plan
- Apprenticeship Standard
- Opens After date
- Closes Before date
- Is New
- Has Applications
Vacancy Results
Once you have made your specifications, select the ![]() icon to run the search. A list of matching vacancies will then be shown underneath the filters. For each vacancy, the following details are shown:
icon to run the search. A list of matching vacancies will then be shown underneath the filters. For each vacancy, the following details are shown:
- Title – Select this to open the corresponding Vacancy Summary.
- Tags – Selecting the
 icon will expand a list of Tags attached to the vacancy. You can select the X within a tag to remove it, or select the + icon to add new tags.
 - Employer – Select this to open the corresponding Organisation Summary.
- Distance
- Contact – Select this to open the corresponding Officer Summary.
- Type
- Places – This shows the number of Advertised and Filled places.
- Status

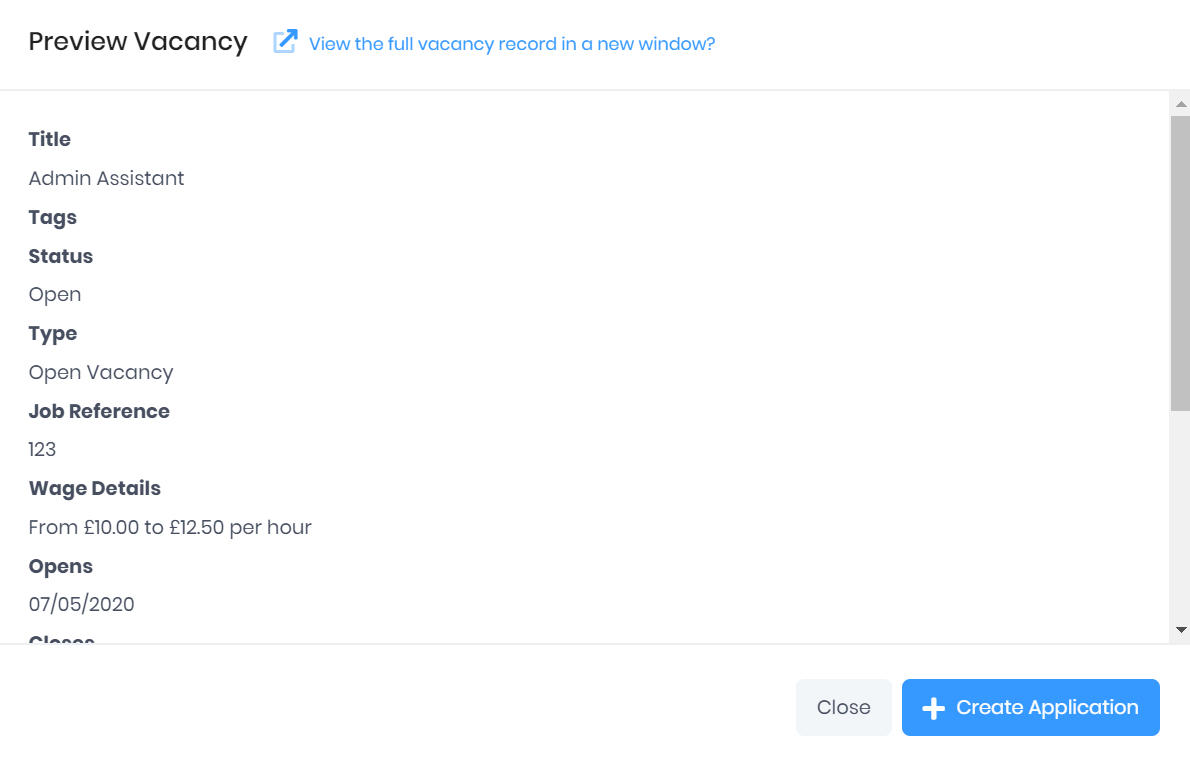
If you want to view more vacancy details but not leave the page, select ... > Preview Vacancy by the vacancy in the list. This will open a window with further vacancy details and a link to Open the Vacancy Summary in a New Window. Selecting Close will return you to the vacancy matching page.
Vacancy Matching from a Vacancy Record
The following instructions cover searching for a suitable applicant from an vacancy record.
Filtering the Applicant Search
The following filters will be shown in the vacancy matching page if you have opened it from the vacancy summary:
- Distance – Here you can specify the maximum distance between the named postcode and the address of the applicant.
- From Post Code – This is the postcode from which the distance will be calculated. This will be set to the postcode of the organisation that posted the vacancy by default.
- Applicant Name/ID – If you are searching for a specific applicant, you can use this field.
Tags – Selecting the Search... box will open a drop-down menu where you can add multiple Tags to search by. The following search options are available:
- Any – This will filter the list to records that contain at least one of the specified tags.
- All – This will filter the list to records that contain every specified tag.
- None – This will filter the list to records that do not have any of the specified tags.
- Number of Records Displayed
Along with these, additional filters are available by selecting More. If a value for any of these has been added to the vacancy record, the filter will be added to the page automatically and populated from the vacancy record. The following filters are available:
- Applicant Status
- Applicant Risk Band
- Applicant Employer
- Applicant Site
- Is New
- Standard Occupational Classification (SOC)
- Sector Subject Area (SSA)
- Occupational Area
- Custom Provision – Custom provisions can be set up and maintained by your database admins in the Custom Provisions section of List and Type Configuration.
- Qualification Plan
- Apprenticeship Standard
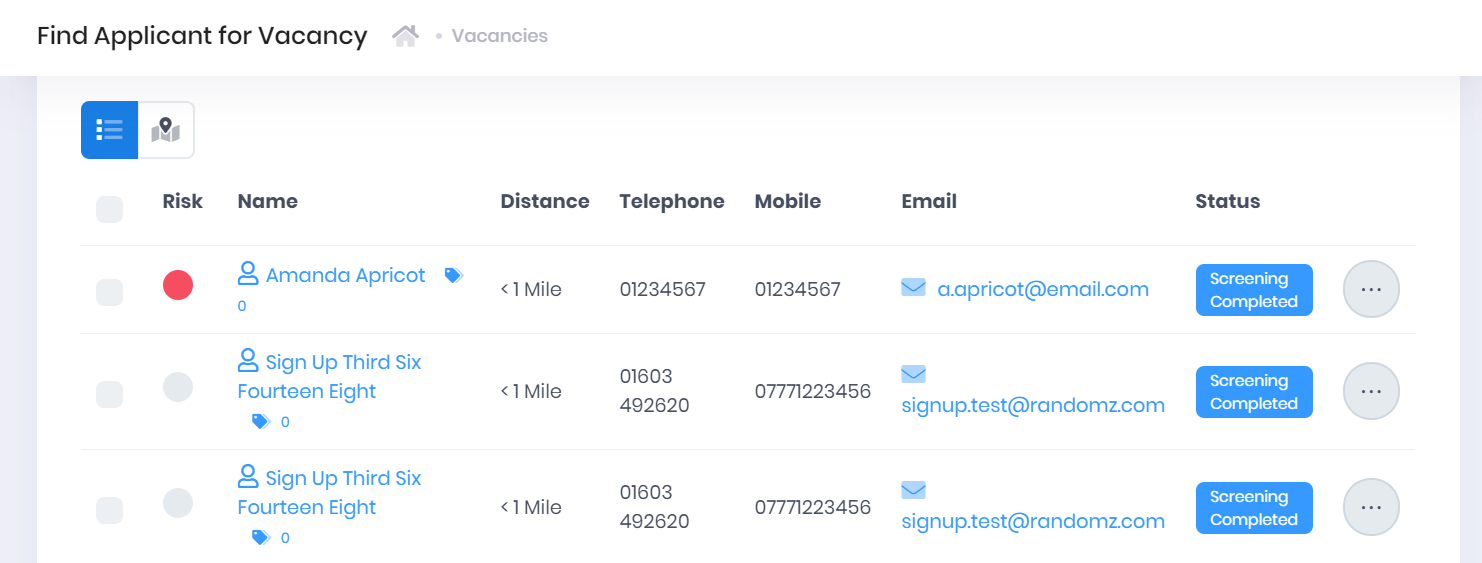
Applicant Results
Once you have made your specifications, select the ![]() icon to run the search. A list of matching applicants will then be shown underneath the filters. For each applicant, the following details are shown:
icon to run the search. A list of matching applicants will then be shown underneath the filters. For each applicant, the following details are shown:
- Risk Band
- Applicant Name – Select this to go to the corresponding Applicant Summary.
- Tags – Selecting the icon will expand a list of Tags attached to the applicant. You can select the X within a tag to remove it, or select the + icon to add new tags.
- Distance
- Telephone
- Mobile
- Email – Select this to open a new email to the applicant in your web email server.
- Status
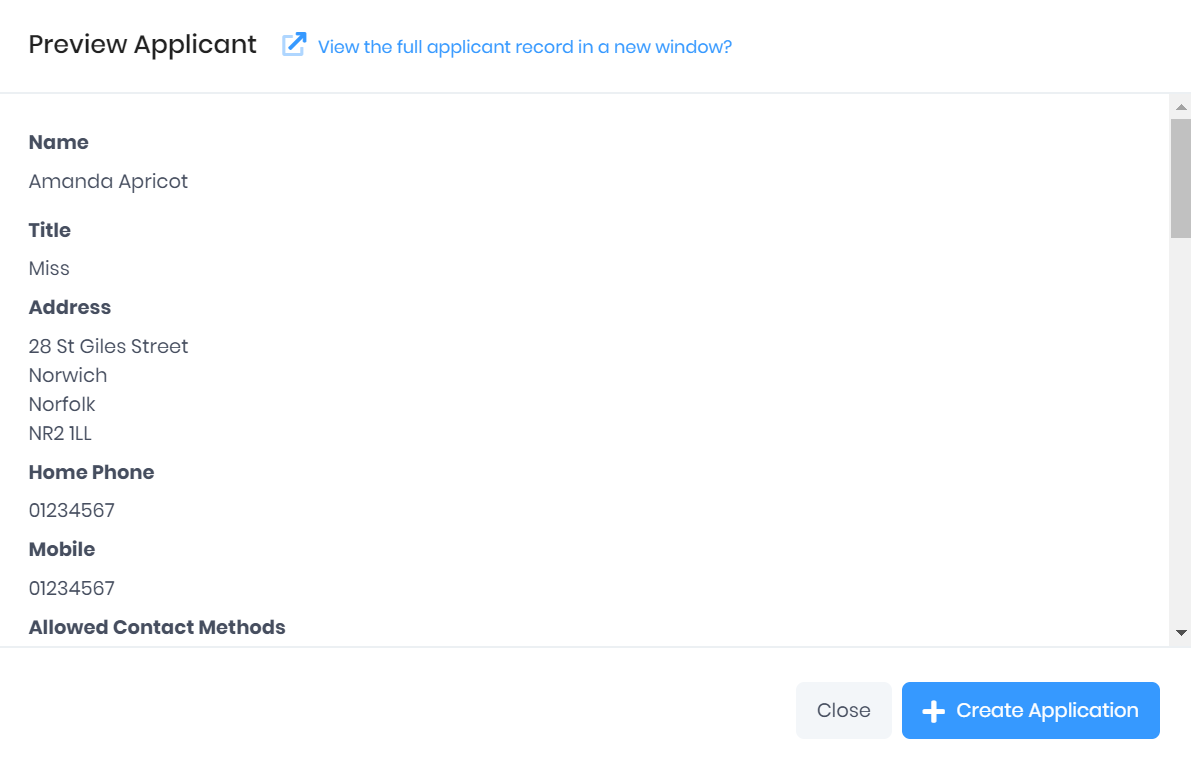
If you want to view more applicant details but not leave the page, select ... > Preview Applicant by the applicant in the list. This will open a window with further applicant details and a link to Open the Applicant Summary in a New Window. Selecting Close will return you to the vacancy matching page.
Map View for Results
If you have specified a Distance restriction for your search, selecting the ![]() icon above the results list will display the results on a map. The specified distance radius will be shown, with any matching results shown with blue icons on the map.
icon above the results list will display the results on a map. The specified distance radius will be shown, with any matching results shown with blue icons on the map.

You can drag around the map to move it, and hold down Ctrl and scroll to zoom in and out. Selecting an icon will open the preview window as explained above.
Creating a New Application
There are several ways to create an application from the vacancy matching window:
- Select ... > Create Application by a result in the list. This will open the New Application window.
- Opening the preview window and selecting Create Application. This will open the New Application window.
- To create multiple applications, use the tickboxes at the left of the results list to select the relevant results. The Create Applications for All button will then appear. Selecting this will open the /wiki/spaces/POH/pages/276450426 window, which will apply to all the application records being created. Once you have saved the new application, rather than being taken to an edit window, you will return to the vacancy matching page.