Vacancies in PICSWeb
The vacancies section of vacancy management allows you to record and manage vacancy records. When you start making Application records, you will need your vacancies set up so that you can match them.
Vacancy List
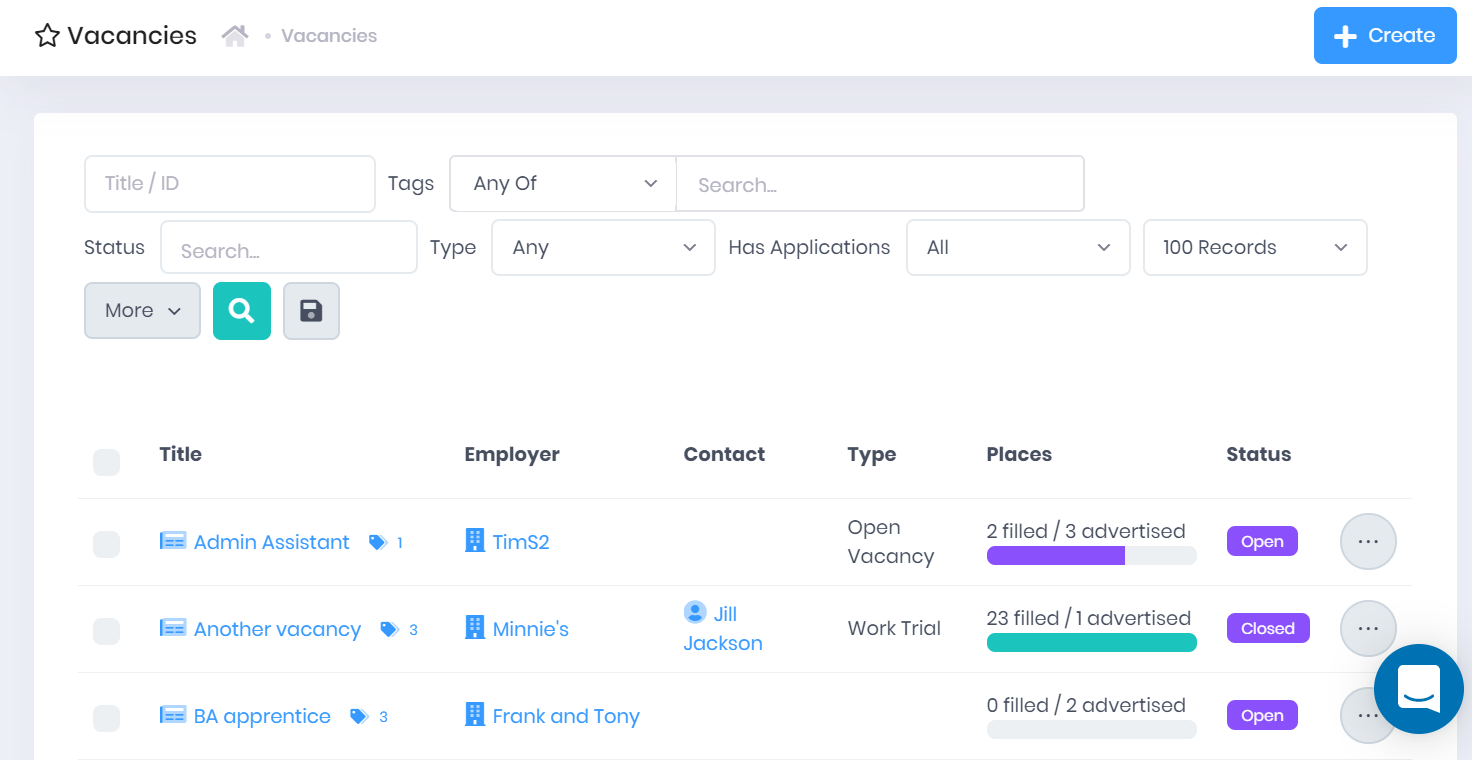
Selecting Vacancies > Vacancies will open the Vacancy List page. This page displays all the vacancy records that you are permitted to view and that match the filters set above the list. For each vacancy, the following details are shown:
- Title – Selecting this will take you to the corresponding Vacancy Summary.
- Tags – Selecting the
 icon will expand a list of Tags attached to the vacancy. You can select the X within a tag to remove it, or select the + icon to add new tags.
 - Employer – This is the Organisation that has posted the vacancy. Select this to go to the corresponding Organisation Summary.
- Contact – This is the external Contact associated with the vacancy. Select this to go to the corresponding Officer Summary.
- Type – Custom types can be set up in the Vacancy Types section of List and Type Configuration.
- Places – This shows the number of both Advertised and Filled places.
- Status – As well as the default inbuilt statuses, custom statuses can be set up in the Vacancy Statuses section of List and Type Configuration.
Tickboxes are also available by each vacancy in the list. You can use these boxes to Bulk Add and Remove Tags.
Filtering the List
The following searching and filtering options are available by default above the list. Once you have entered the necessary details, press Enter or select the ![]() icon to run the search and apply your filters.
icon to run the search and apply your filters.
- Sort By – Here you can use the drop-down menu to choose how the list is ordered.
- Search – Here you can search by vacancy Title or ID.
Tags – Selecting the Search... box will open a drop-down menu where you can add multiple Tags to search by. The following search options are available:
- Any – This will filter the list to records that contain at least one of the specified tags.
- All – This will filter the list to records that contain every specified tag.
- None – This will filter the list to records that do not have any of the specified tags.
- Status
- Type
- Has Applications – Here you can restrict the list to only vacancies that do or do not have applications recorded.
- Number of records – Here you can use the drop-down menu to choose how many results are displayed per page.
Along with these, additional fields can be added by selecting More. Choosing a field will add it to the top bar, where it works like the filters explained above. The following fields are available:
- Opens After date
- Closes Before date
- Is New
- Standard Occupational Classification (SOC) code
- Sector Subject Area (SSA) code
- Occupational Area
Exporting the List
Selecting More also shows an option to Export to Excel. Selecting this will generate an Excel Spreadsheet containing the details currently displayed in the list.
Vacancy Actions
Selecting Create from the top-right corner of the page will open a window where you can Create a New Vacancy. Along with this, the following options can be accessed from selecting the ... icon by a vacancy in the list:
- Summary – This will open the Vacancy Summary in a new page.
- Edit – This will open a window where you can Edit the Vacancy.
- Delete – You will be prompted to confirm that you want to delete the record.