/
Editing Appointments in PICSWeb
Editing Appointments in PICSWeb
- Joe Robson (Unlicensed)
Owned by Joe Robson (Unlicensed)
Last updated: May 27, 2021
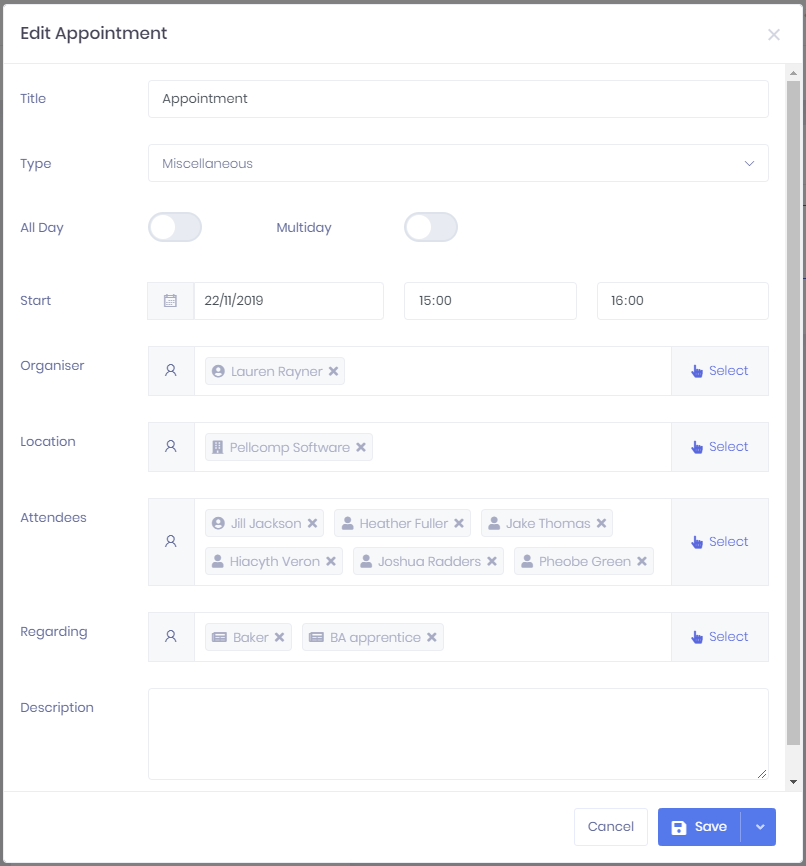
Selecting Edit from either an Appointment Preview in the Calendar or the top-right corner in an Appointment Summary will open a window where you can edit certain fields. Once you have finished, the following options are available:
- Save – Select this to apply the changes and return to the page you were originally on.
 > Save and View – Select this to apply the changes and then go to the Appointment Summary.
- Cancel – Select this to exit without saving.
The following fields are available to edit:
- Title
- Type – Custom types can be set up in the Appointment Types page in Lists and Types Configuration.
- All Day – If you select this, the options to specify start and/or end times will be removed.
- Multiday – If you select this, you will be able to specify an end date as well as a start date.
- Start and End date and time – The options here will depend on which options you have selected above.
- Organiser – Selecting Select will open a window where you can search for Officers and select the
 icon to add them. Once you have finished in the list, select Done to add the officers to the field. Each officer will have a
  icon, which you can select to remove them.
 - Location – Selecting Select will open a window where you can search for Organisations and select the icon to add them. Once you have finished in the list, select Done to add the organisations to the field. Each organisation will have a icon, which you can select to remove them.
- Attendees – Selecting Select will open a window where you can search for Learners, Applicants, or Officers and select the icon to add them. Once you have finished in the list, select Done to add the records to the field. Each record will have a icon, which you can select to remove them.
- Regarding – Selecting Select will open a window where you can search for Learners, Applicants, Organisations, Officers, Vacancies, Vacancy Applications or Opportunities and select the icon to add them. Once you have finished in the list, select Done to add the records to the field. Each record will have a icon, which you can select to remove them.
- Description
Related content
Appointment Summary in PICSWeb
Appointment Summary in PICSWeb
Read with this
PICSWeb Calendar
PICSWeb Calendar
Read with this
Files in the PICSWeb Appointment Summary
Files in the PICSWeb Appointment Summary
Read with this
File Types in PICSWeb Configuration
File Types in PICSWeb Configuration
More like this
Creating a New Officer in PICSWeb
Creating a New Officer in PICSWeb
More like this
Files in the PICSWeb Learner Summary
Files in the PICSWeb Learner Summary
More like this