| Div | ||||||
|---|---|---|---|---|---|---|
| ||||||
|
...
The communications list displays any emails or calls that match the filters set above the list. For each communication, the following details are shown:
- Incoming or Outgoing – A
 icon indicates an outgoing communication, whereas a
  icon indicates an incoming communication.
 - Call or Email – The
 and
and  icons represent calls and emails respectively.
 - Subject
- Tags – Selecting the
 icon will expand a list of Tags attached to the communication. You can select the X within a tag to remove it, or select the + icon to add new tags.
 - From – Select the record name to go to the corresponding record summary page.
- To – Select the record name to go to the corresponding record summary page.
- Regarding – Select the record name to go to the corresponding record summary page.
- When – This shows the date and time of the communication. For calls, you can also view the Duration of the call in the Communication Summary.
...
Selecting More also shows an option to Export to Excel. Selecting this will generate an Excel Spreadsheet containing the details currently displayed in the list.
Logging a New Email
| Info |
|---|
| Instead of manually logging emails, it is possible to use the PICSWeb Email DropBox to import emails forwarded or BCC'd to a specific address. |
To record a new email, select Actions > Log Email from the top-right corner of the page. This will open the Log Email window, where you can enter the following details for the communication:
- From, To, CC and Regarding – In each of these fields, selecting Select will open a window where you can search for Learners, Applicants, Organisations or Officers and select the
 icon to add them. Once you have finished in the list, select Done to add the records to the field. Each record will have a
  icon, which you can select to remove them. Buttons are also available to swap records between the fields in case of mistaken entry.
 - Subject
- Sent date and time
- Message – Some formatting options are available in this field.
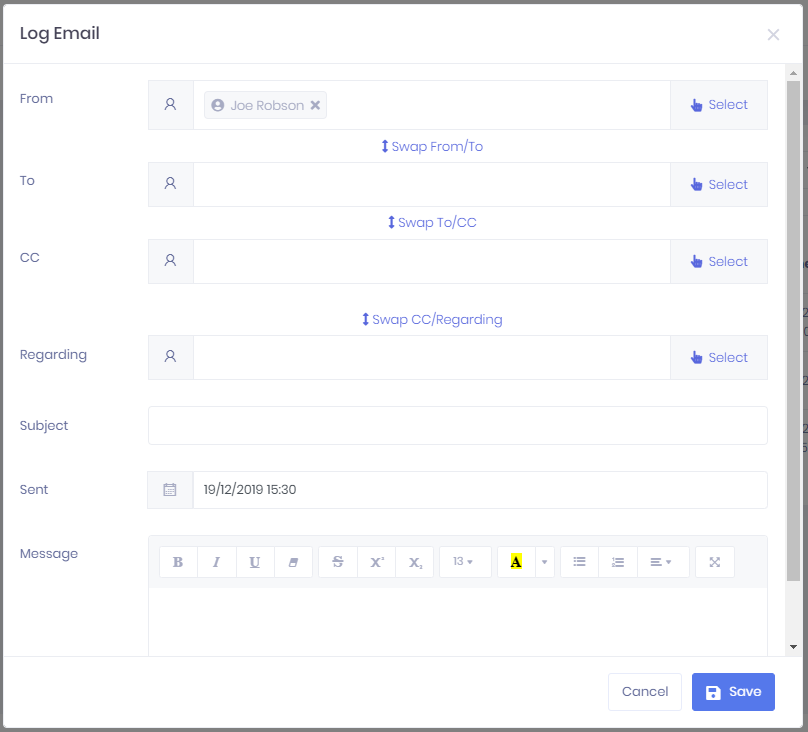
Once you have entered the necessary details, select Save to continue or Cancel to exit without saving.
...
- From, To and Regarding – In each of these fields, selecting Select will open a window where you can search for Learners, Applicants, Organisations or Officers and select the icon to add them. Once you have finished in the list, select Done to add the records to the field. Each record will have a icon, which you can select to remove them. Buttons are also available to swap records between the fields in case of mistaken entry.
- Subject
- When – Here you can enter the date and time that the call began.
- Duration
- Summary
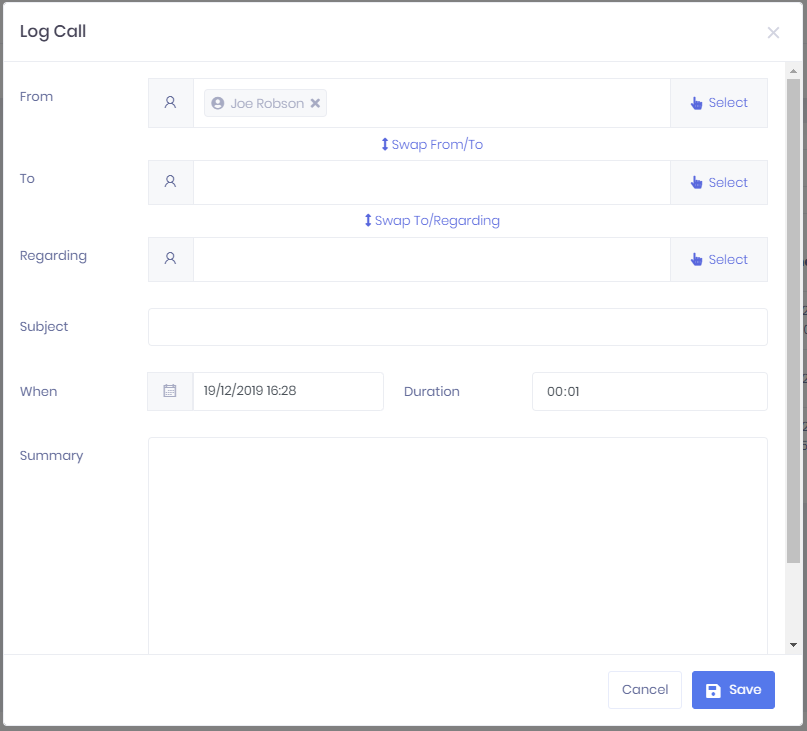
Once you have entered the necessary details, select Save to continue or Cancel to exit without saving.
...
- Summary – Selecting ... > Summary by a communication in the list will open the corresponding Communication Summary page.
- Edit – Selecting ... > Edit by a communication in the list will open the Edit Communication window.
- Delete – Selecting ... > Delete by a communication in the list will remove the communication. You will be prompted to confirm before the communication is deleted.