...
| Div | ||||||
|---|---|---|---|---|---|---|
| ||||||
|
This guide demonstrates how takes you through the steps needed to migrate your on-premise copy of PICS to Pellcomp's hosting platform.
Logging into the correct server
The server that is needed is the one that has the Pellcomp eFileStore Service installed. Once located log in to this server using an account with administrator privileges.

...
. If you haven't already you should download a copy of our Hosting Migration tool.
Starting in the right location
To ensure the migration tool can do everything required, we need to run this process from the correct location. If you have eFilestore you need to be logged in to the server that is running the Pellcomp eFilstore Client Service with administrator privileges.
If you don't have this feature then you need to be on your main PICS server where the software is installed.
Running the Hosting Migration Wizard
If you don't have the HostingMigration exe yet, download a zip.
The Hosting Migration Wizard should be placed extracted in to the PICS EXE Directory.
You can open this directory from the PICS login screen. Select Help → About PICS.
...
And then click the Program button to open the PICS EXE folder.

If you don't have Launch the HostingMigration exe , you can download a zip and extract the contents into the PICS EXE directory which was opened using the above Program button.Launch the HostingMigration exe file (you should you have placed in the PICS software folder. You may be prompted by Windows UAC), please accept and continue.
Select a PICS database and login
Select the PICS Database Directory you wish to migrate to Pellcomp Hosting. As above it can be found from the PICS login screen. Select Help → About PICS.
Under Trial run or the live migration select:
- Trial - If this is a trial run to ensure you can get the files to pellcomp and to start replicating your eFileSTore documentseFileStore documents (if you have this feature).
- Live - If you have already completed a trial run, eFileStore (if you have this feature) has finished replicating your documents, and you are now ready to disable your on-premise copy of PICS and move you your database to Pellcomp Hosting.
...
Skip to the next section If you do not have an eFileStore license or do not use eFileStore to manage documents uploaded into PICS.
| Expand | ||
|---|---|---|
| ||
Because document replication can take hours or days it is recommended you complete this step as soon as you have confirmation that you are migrating PICS to Pellcomp hosting. This page attempts to detect if you are currently logged into the server running the eFileStore service based on the IP address of the eFileStore URL. Because replication from on-premise to Pellcomp hosting is a new feature, it is likely you will need to download the latest eFileStore installer using the link provided to upgrade your on-premise eFileStore . Once eFileStore is at the correct version the eFileStore Config application can be launched using the button provided (you may need to |
...
press the |
...
[F5] key to refresh the page).
On the Replication tab, click the Replicate to Pellcomp Hosting button. Then click the Save all settings button. If you receive an error saving the settings you will need to close the tool and start it again using Run as Admin permissions.
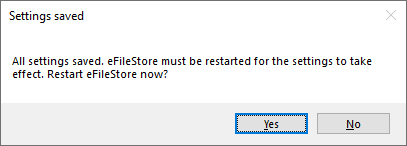
When prompted you should restart the eFileStore services as the changes will not take effect until the services are restarted.
Replication will normally take several hours, days or weeks so keep an eye on Replication Progress from the File Data tab. If replication stops progressing close to 100% then there may be a few files which can't replicate. You can report on these replication issues using the Launch eFileStore Health Check app button.
Once the eFileStore config tool is closed the wizard will progress to the Zip and upload stage. |


PICS Services
This step will be disabled for trial runs as PICS services should only be disabled during a live migration.
It is recommended to Stop & Disable Scheduled Reports services as this service can prevent exclusive access to the PICS database which is required for live migrations. It will also prevent scheduled reports from being created and sent using your on-premise data which is no longer you your live data.
You can also Stop & Disable the eFileStore services but only do this if you are sure you your eFileStore documents have finished replicating to Pellcomp's servers. You can check the replication status following the instructions on the previous eFileStore Replication page.
...
DB Available Disk Space - The amount of free disk space on the partition containing your PICS database. If this is a trial run and other users are using PICS you will need at least twice the size of you your PICS DB in free space to perform a backup while anything is accessing the database (live backup).
Zip Storage Directory (Optional) - If you want to specify where the zip file which is generated and uploaded to Pellcomp is saved you can specify a folder. If left blank the Windows userUser's temporary directory will be used.
Zip Available Disk Space - The amount of free disk space for the zip files, either the partition specified in the Zip Storage Directory or the Windows userUser's temporary directory.
Upload Method - Upload options are:
...
Skip to the Summary section if you do not have an FCA license.
| Expand | ||
|---|---|---|
| ||
|
...
Enter the FCA Web Service URL provided to you by the Pellcomp implementation team. Once this setting is saved, all incoming FCA connections to your on-premise PICS will be instructed to redirect to the Pellcomp hosting URL. There is also a link to a guide on how to manually setup redirects in IIS. This option is useful if you intend to immediately archive or disable internal access to your PICS database.
|

Wizard Summary
That's it, you've reached the end of the migration wizard, click Close Wizard.
...