Opening an Appointment Preview in the Calendar and selecting Summary will open the Appointment Summary page. In this page you can view appointment details and Edit the Appointment.
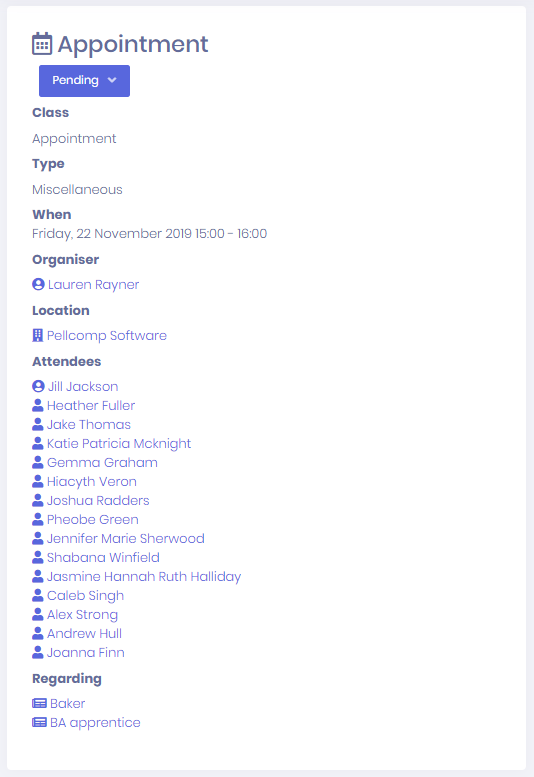
Appointment Details
The details section shows any details that you have recorded
...
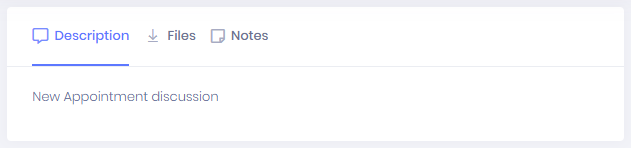
The remaining details for the appointment are divided into three tabs: Description, Files, and Notes.
Description
This tab displays the description entered for the appointment. You can make changes to the description when Editing the Appointment.
Files
This tab displays any files attached to the appointment. For each file, the Description is shown.
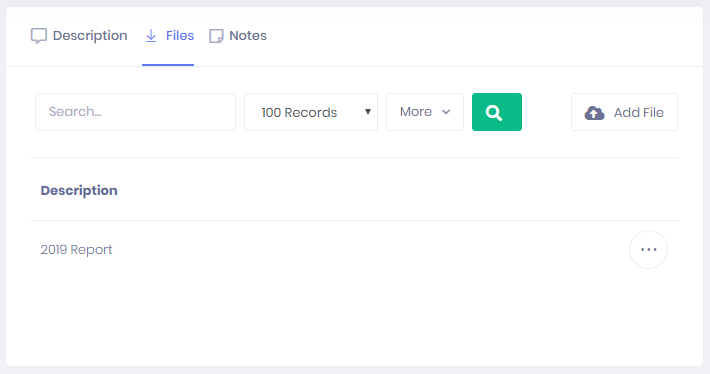
Filtering the Files List
The following searching and filtering options are available by default above the list. Once you have entered the necessary details, press Enter or select the ![]() icon to run the search and apply your filters.
icon to run the search and apply your filters.
- Description Search
- Number of files displayed
Exporting the Files List
Selecting More also shows an option to Export to Excel. Selecting this will generate an Excel Spreadsheet containing the details currently displayed in the list.
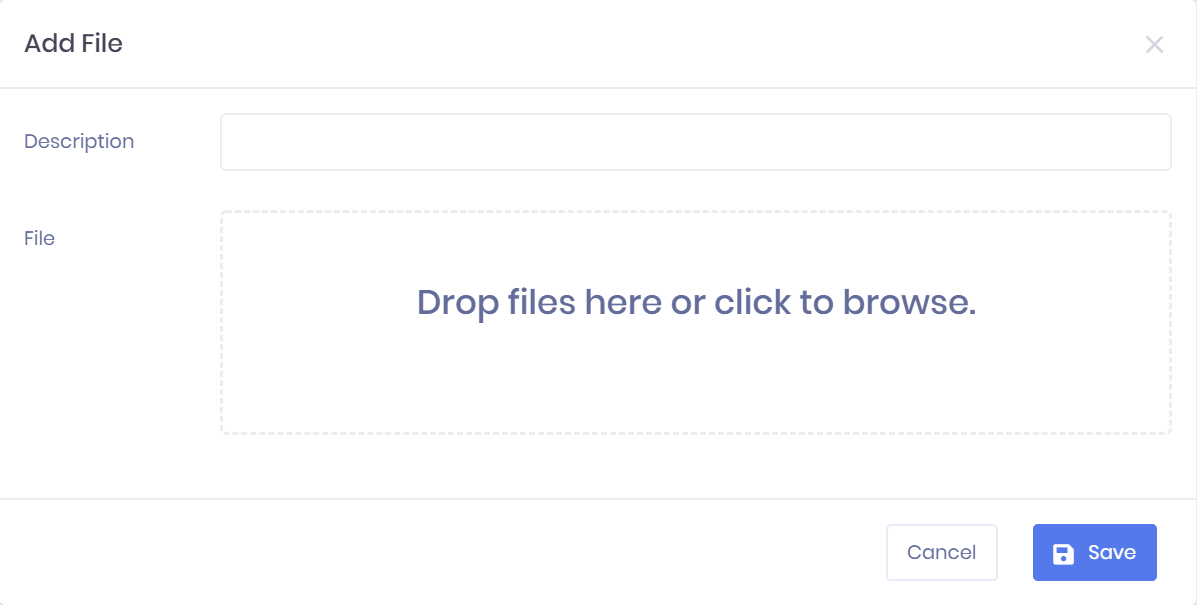
Adding File Attachments
Selecting Add File will open the Add File window. Here you can enter the Description for your file attachment, and either drag and drop a file into the box or select it to browse for the file. Once you are finished, select Save to finish.
Notes
This tab displays any notes entered for the appointment. Icons at the left of the tab indicate who has written each note. For each note, the title, date of entry, and text body is shown, along with a flag if the note is New.
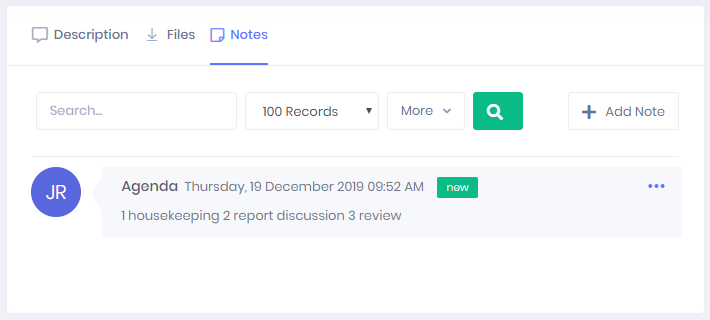
Filtering the Notes List
The following searching and filtering options are available by default above the list. Once you have entered the necessary details, press Enter or select the ![]() icon to run the search and apply your filters.
icon to run the search and apply your filters.
- Title and Body Search
- Number of notes displayed
Exporting the Notes List
Selecting More also shows an option to Export to Excel. Selecting this will generate an Excel Spreadsheet containing the details currently displayed in the list.
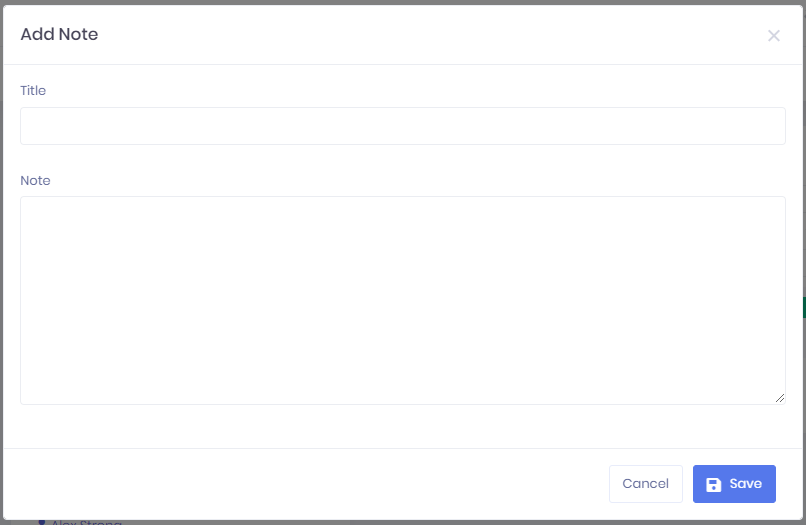
Adding Notes
Selecting Add Note will open the Add Note window. Here you can enter the title and body text for your note. Once you are finished, select Save to finish.
...
It is possible to change the Status of the appointments using the blue drop-down menu. Selecting the names of any of the Organiser, Attendees or Regarding records will take you to the corresponding record summary.
Other Information
The remaining details for the form are found in the tabs in the summary page. The following tabs are available: